


I love these little bags or hussifs, to use the historical term. Inside can be whatever you need. I have a zippered pocket, a small pocket and ribbon to hold my scissors and another small pocket for a notebook.

The example will be a hussif I made for my friend Michelle. She'll be using it to carry her ostomy supplies when traveling. I really don't know how to make this look good so bear with me.
First step is your pattern. I usually just use printer paper taped together:

Michelle's hussif is 19" x 9 1/2". This is a little big for tucking in your knitting bag. I make my hussifs 16 1/2" x 7 1/2". This is when you decide on your pockets and placement. I use a 1/2" seam allowance for everything.
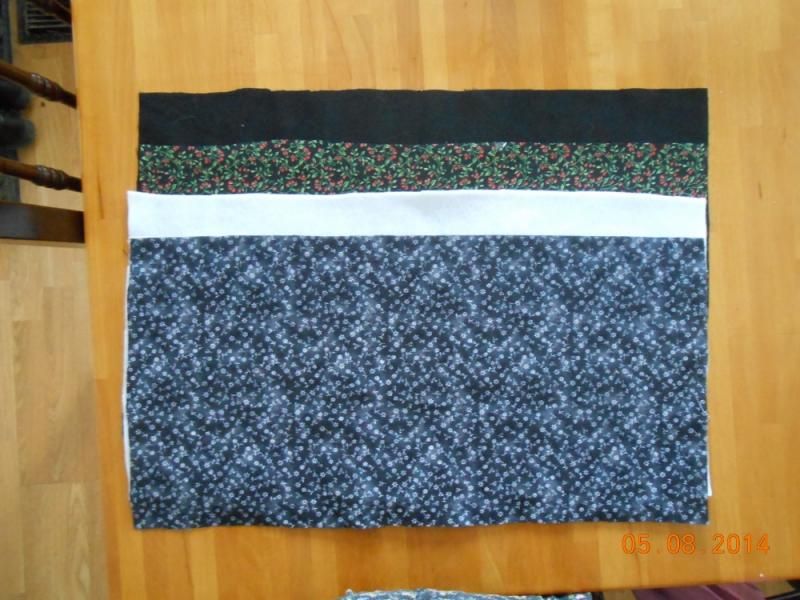
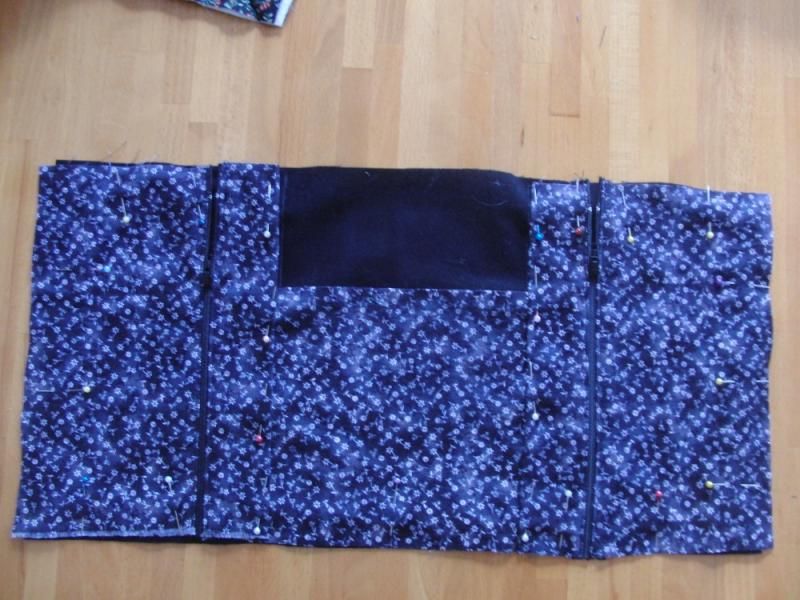
You need to cut out 4 rectangles. One is the outside fabric (the black monotone floral). The next is hard to describe, it's like batting but not soft like for quilting. It's a personal choice really, you just want to give your hussif some body. The other floral (second from top) is for the lining. We're going to quilt the front and this piece is the backing. The last piece (the black) is the inside. You will also cut out all the pockets and flaps. Now measure around your rectangle and then add a few inches, this is how much 'bias' tape you need (I don't always cut it on a bias). Make the tape 2 inches wide.
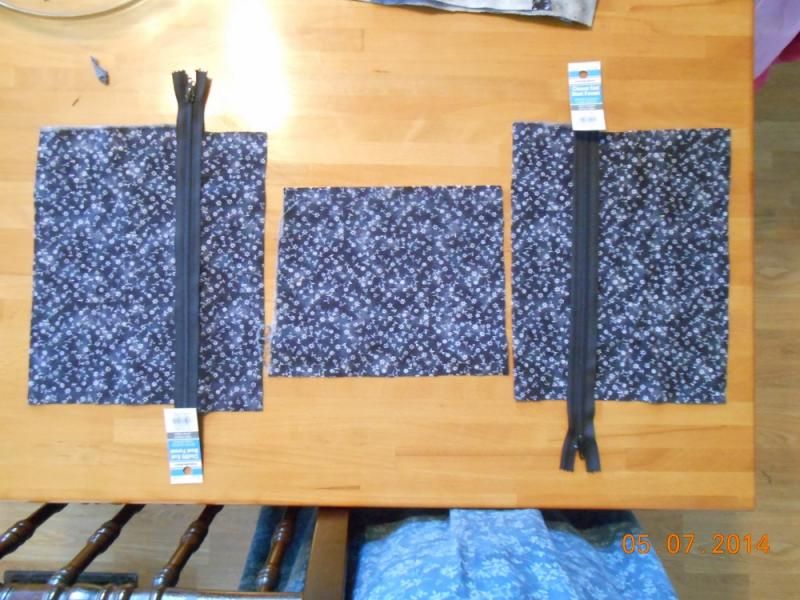
Two zippered pockets for Michelle and a centre pouch. Remember when buying zippers, it's always better to have zippers that are too long than too short.

Insert the zipper(s). Cut off the extra zipper (don't use your good fabric scissors). Sew all your pockets to the inside piece (black).
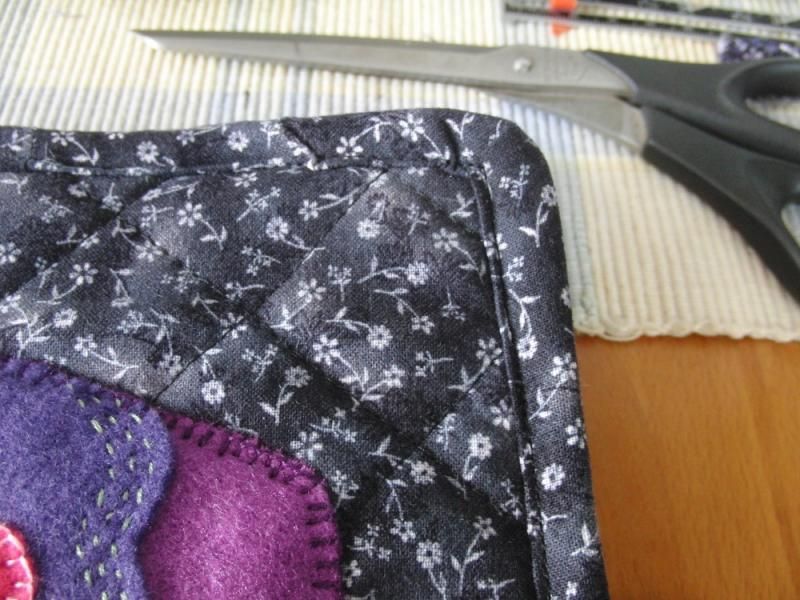
Now head over to Wee Folk Art and choose an applique for the front of your hussif. Of course if you are creative feel free to make your own applique.
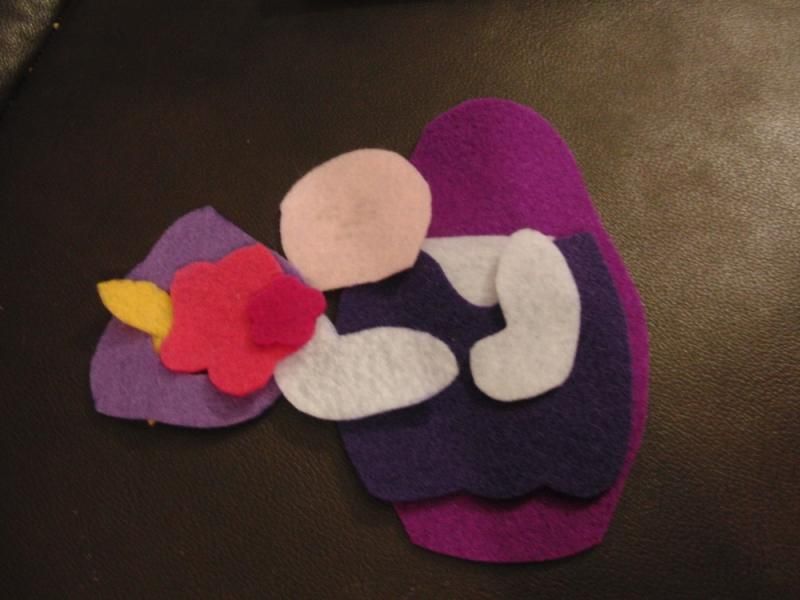
Cut out all the pieces you need from felt. Of course wool felt would be nicest, but more often than not we just use felt from Michael's.
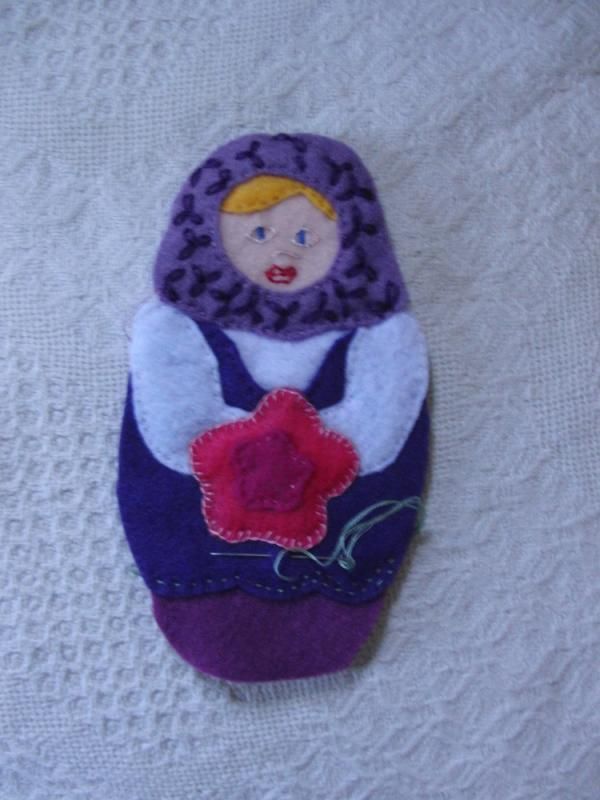
Embroider the pieces as you like. I love the Babushka doll.

Put the top, the batt and the lining together. Mark out your quilting lines. Mine are about 1 1/4 " because that's what my ruler measures. Just do it how you like. When stitching, I always start with one of the long middle lines. Also I sew down the line one direction and then turn and sew up the next. I find this helps prevent puckering. I also use as few pins as possible.
When the quilting is done, sew the applique to the front of the hussif. When centering, don't forget to leave space for the bias tape.
Now baste the front and the back together around the outside. Mark the two fold lines and stitch. This will help make the folds neat.
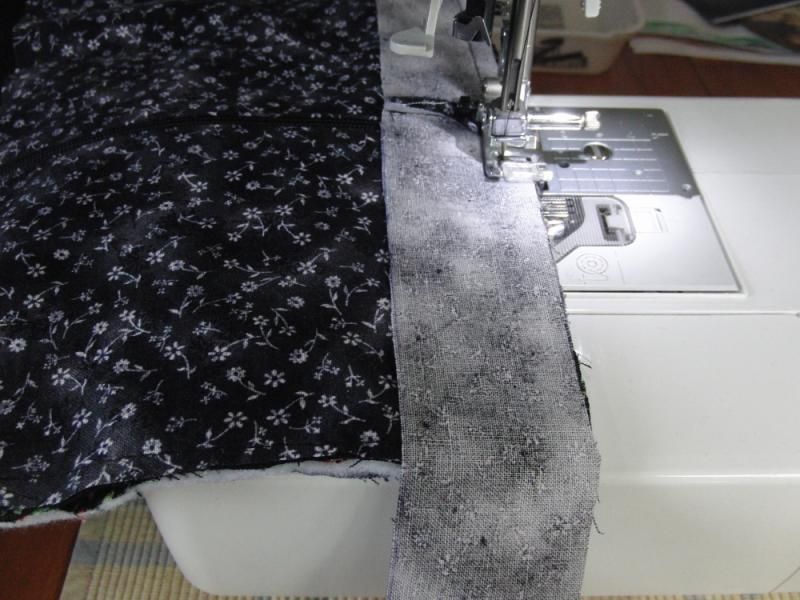
Now sew on the bias tape. Start on the back (it keeps the front neat and tidy). To make the corners easy, sew the tape on one side, all the way down. Cut thread.

Turn your work to the next side. Fold the tape as shown in the picture. Again sew all the way across. Continue until all for sides are finished.
Now fold the bias tape around to the front, folding under the seam allowance. Stitch around.

Add a ribbon loop to the front and a button to the back and you are finished.
How's that? Clear as mud :) Please send in any questions.
Joining the other 'sewing goddesses' over at Dandelion House.
No comments:
Post a Comment